Quick answer
Fall gutter maintenance in Oregon means clearing leaves, needles and moss from the trough, flushing every downspout, watching the water actually move during a rain or hose test, and repairing sags, leaking corners and loose straps before the rain sets in. Most Oregon homes need this done between late September and mid November.
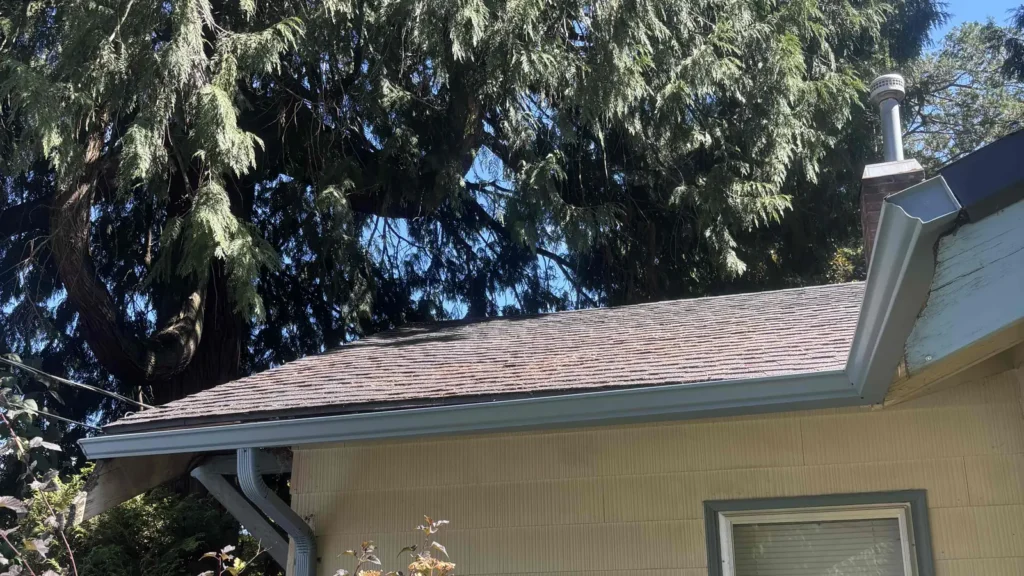
Your gutters either handle heavy rain or they do not, and you find out during the first real storm. This checklist covers the nine things worth doing before that storm arrives, in the order a professional crew would do them.
In this guide
Why Fall Is the Key Gutter Checkpoint in Oregon
Fall is when the most debris lands in your gutters and the heaviest rain returns, often within the same few weeks. A check in late September or October catches summer buildup before it gets soaked, and a second look after the leaves are down catches what fell since.
Several things pile up at once in Northwest Oregon:
- Leaf drop. Maples, oaks, alders, and fruit trees drop their leaves through the fall. One large maple leaf can cover a gutter outlet.
- Conifer needles. Douglas-fir, pine, and cedar drop needles all year, and OSU Extension notes that conifers naturally shed older needles in summer and fall. Needles slip into gutters easily and pack tightly once wet.
- Moss and roof grit. Moss on shaded roofs loosens in the rain and washes into gutters along with shingle granules. OSU Extension’s moss guidance notes that moss growth can slow or prevent water flow off a roof.
- Summer buildup. Dry debris looks harmless. Once it’s soaked, it becomes a heavy, compact layer that holds water against the gutter and the fascia board behind it.
- Long wet periods. In winter, gutters may carry water for days at a time, so a partial clog or slow drip gets tested over and over.
Trees make the biggest difference. A home under tall firs usually needs more attention than a house on an open lot. For year-round timing, see our guide on how often to clean gutters in the Pacific Northwest, which breaks it down by tree cover.

Fall Gutter Checklist for Oregon Homes
Use this list as a quick reference while you walk around the house. Each task is explained below.
- Remove leaves, needles, moss, and roof debris
- Clear gutter outlets and flush downspouts
- Test gutter flow with rain or a hose
- Check corners and end caps for leaks
- Look for loose hangers and sagging sections
- Inspect the fascia and roof edge
- Check downspout straps and connections
- Remove debris sitting on gutter guards
- Confirm water drains away from the home
1. Clear Leaves, Needles, and Moss
Remove everything in the gutter trough, not just the leaves on top. The layer behind most fall clogs is the dense mat of needles, moss, and grit underneath.
Debris collects most heavily under overhanging branches, below roof valleys where two slopes funnel debris to one spot, around outlets, against hangers (the brackets that run across the gutter), and at inside corners.
Why needles cause different problems than leaves
Broad leaves sit loosely and usually come out in clumps. Fir, pine, and cedar needles are thin, lie flat, and interlock. After a few rains they compress into a mat that holds water like a sponge and slowly creeps toward the outlet, where it plugs the opening.
Moss makes it worse. Clumps that slide off the roof are heavy when wet and carry grit and shingle granules with them. That material settles to the bottom of the trough as a sandy sludge you can’t see from the ground.
What to do: After clearing a section, run a gloved hand or a small scoop along the bottom of the gutter. If you feel gritty sludge or see a dark layer of matted needles, that section isn’t finished.
Safety note: Wet leaves, needles, and moss make ladders and roofs slippery. Set your ladder on firm, level ground, keep three points of contact, and don’t lean the ladder against the gutter. OSU Extension advises against climbing on the roof to deal with moss. If your gutters are two stories up, above a steep slope, or over a deck or patio, this is a good job to hand off.
2. Flush Outlets and Downspouts
A downspout may be clogged if water backs up around the outlet, drains unusually slowly, or overflows from the gutter even after the trough is clear. A clean gutter doesn’t help if the water can’t get out of it.
How to check whether a downspout is open
- Look into each outlet, the opening in the bottom of the gutter that feeds the downspout. You should see open space, not a plug of needles or a leaf lying flat across the hole.
- Run a garden hose into the outlet at a moderate flow.
- Watch the bottom of the downspout. Water should come out in a steady stream shortly after you start.
- If water backs up in the gutter or only trickles out below, there’s a blockage between the outlet and the discharge.
Most clogs form at the elbows, the bends near the top and bottom of the downspout. Needles and moss get pushed into the first bend and wedge there. Tapping along the pipe can help locate them, since a packed section often sounds dull instead of hollow.
Also look for sections separated at a joint, crushed elbows, or a downspout that no longer lines up with its outlet. If a downspout keeps clogging, is damaged, or seems too small for the roof area it drains, it may be time to look at downspout installation and drainage upgrades instead of clearing the same spot every few weeks.
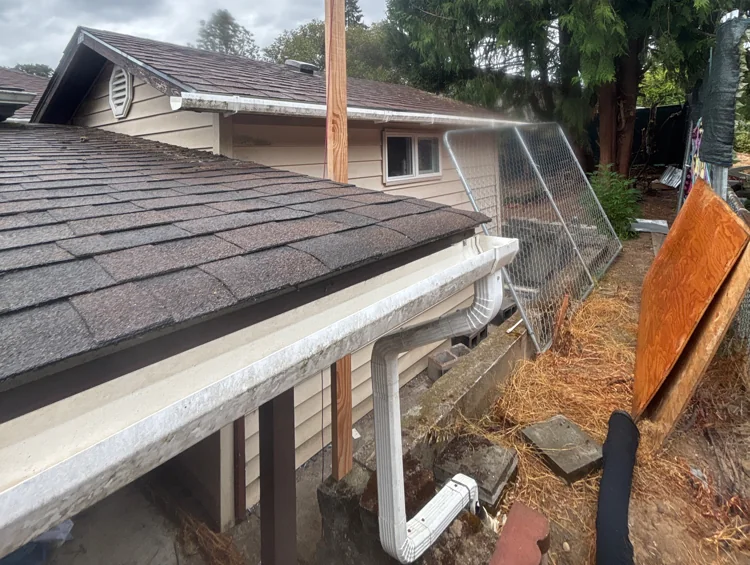
3. Watch Water Flow During Rain or Run a Hose Test
In a working gutter, water moves steadily toward the downspout, drains out without backing up, and leaves little or no standing water once the rain stops. Overflow, pooling, drips, or water running behind the gutter all point to a problem worth tracking down.
The first steady fall rain gives you a free test: put on a rain jacket and walk around the house. On a dry day, place a hose at the end of the run farthest from the downspout and let it run for a few minutes.
| What you see | What it may indicate |
|---|---|
| Standing water after the flow stops | A low spot from sagging or incorrect pitch, or debris holding water back |
| Water spilling over the front edge | A clogged outlet or downspout, a debris dam, or more water than that section can carry |
| Water shooting past the gutter in heavy rain | Fast runoff from a steep slope or roof valley overwhelming that spot |
| Water moving slowly or stopping partway | Debris in the trough or a section sloped the wrong way |
| Drips at seams, corners, or end caps | Failed sealant or a separated joint |
| Water running down the fascia or siding behind the gutter | A gutter pulled away from the fascia, or water getting behind its back edge |
| One downspout overflowing while others keep up | A partial blockage, or more roof area than that downspout can handle |
Treat these as clues, not a diagnosis. Note where each problem shows up so you can look more closely in the steps below.
4. Check Corners and End Caps
Corners, end caps, and seams are the most common leak points on a gutter system. They’re joints held together by fasteners and sealant, and sealant breaks down with age and movement. Look for drips during rain and staining below these spots.
Signs of a leaking joint:
- Drips from a corner or end cap during rain or a hose test
- Dark streaks, stains, or mildew on the fascia or siding below a joint, which remain after the rain stops
- Cracked, peeling, or missing sealant inside the joint
- A shifted end cap or a corner that has pulled apart
- Moss growing out of a joint and holding water there
Minor fix or professional assessment?
A single drip at one end cap on an otherwise solid gutter is usually a localized fix: clean the joint, let it dry, and reseal it. Sealant needs a dry surface to bond, and dry days get scarce as fall goes on, so handle this early.
Have someone take a look when several joints leak at once, a corner has separated or bent, the metal around a joint is corroded or cracked, or a leak returns soon after resealing. Those patterns can point to movement, pitch problems, or an aging system. Our gutter repair services cover leaking joints, corners, and damaged sections.
5. Look for Sagging Gutters or Loose Hangers
Stand back and sight along each gutter from a corner of the house. It should follow a straight, even line with a slight slope toward the downspout. Dips, bows, or sections pulling away from the house mean the support system needs attention.
Check for:
- Sections that dip between hangers
- A gap between the back of the gutter and the fascia board
- A gutter leaning forward or tilting outward
- Loose, backed-out, or missing fasteners
- Water standing in one spot after rain
- A run that looks uneven compared with the roofline
Why a clean gutter can still hold water
Gutters are installed with a gentle slope, called pitch, so water flows toward the outlet. If a section sags or was set without enough slope, water settles in the low spot instead of draining. That standing water adds weight, catches debris, and can pull the section down further.
So a gutter can be completely clean and still overflow. Fall adds to the strain: soaked debris and a full gutter during long rains put more load on every hanger, and weak ones tend to show it.
6. Inspect the Fascia and Roof Edge
The fascia is the board along the roof edge that your gutters attach to. If it’s stained, soft, peeling, or separating from the gutter, water has likely been reaching the wood, and the problem may go beyond a dirty gutter.
Look for:
- Dark staining on the fascia or the underside of the eaves
- Peeling or blistering paint along the roof edge
- Soft, crumbling, or splintered wood near gutter attachment points
- Gaps between the gutter and the fascia
- Spots that stay dark and damp long after rain stops
- A gutter that shifts at its attachment points when you press lightly on it (don’t pull on it)
During a long wet stretch, fascia that gets soaked by every overflow has little chance to dry out between storms. Peeling paint on sound wood may only need scraping and repainting in dry weather. Soft wood behind the gutter, hangers that won’t hold, or a gutter pulling away usually means the fascia needs a closer look before the gutter can be securely reattached. That calls for someone who can assess the wood, not just the gutter.
7. Check Downspout Straps and Joints
Downspouts are part of your drainage system, not an accessory hanging off the gutter. Every strap, elbow, and joint needs to be secure so water stays inside the pipe from the roof edge to the ground.
Walk each downspout from top to bottom:
- Straps: the brackets holding the downspout to the wall. Look for loose, bent, or missing ones.
- Elbows and joints: look for cracks, crushed spots, gaps, or drip marks where pieces connect.
- Dents and splits: often from ladders or mowers. Dents narrow the pipe and catch debris.
- Separation from the wall: a downspout that sways in the wind stresses the outlet above.
- Discharge point: make sure the bottom elbow is attached and pointed away from the house.
A loose downspout seems minor, but a section that shifts during a windy storm can pull away from the outlet and dump roof water straight down the wall. Tightening a strap in fall is far easier than dealing with that water all winter.
8. Clear Debris Sitting on Gutter Guards
Gutter guards reduce what gets into the gutter, but they don’t make it maintenance-free. Leaves, needles, and moss can collect on top of a guard, and a blocked surface sends water over the edge instead of into the gutter.
What to check in fall:
- Leaves or needle mats lying on the guard, especially below overhanging trees
- Heavier buildup below roof valleys and where a roof meets a wall, since these spots concentrate water and debris
- Fine needles, moss, or grit caught in mesh or perforations
- Guards that have lifted, shifted, or come loose
- Overflow at guarded sections during rain, even if the gutter below is clean
Surface debris can usually be brushed off with a gloved hand from a stable ladder. Avoid prying guards up unless you know how they’re fastened, since a bent guard can leave new gaps.
Guards don’t take the rest of the system off your list. Fine material can still work into the gutter over time, so confirm that outlets and downspouts are draining. A guard also can’t fix a sagging or leaking gutter; those problems should be repaired before a guard goes on. If you’re weighing options for a property with heavy fir or pine cover, our page on gutter guard installation for Oregon homes explains how different guard types handle fine needles and why periodic inspections still make sense.
9. Confirm Water Exits Away From the Home
Finish by following the water to where it leaves the downspout. Roof water should flow away from the house, not pool against the foundation, soak the soil next to the wall, or run back toward the building.
At each discharge point, check for:
- Water pooling right beside the house after rain
- Extensions or splash blocks knocked loose, disconnected, or moved during yard work
- Discharge paths blocked by leaves, bark mulch, soil, or plants
- Ground that slopes back toward the home
- Erosion, washed-out mulch, or bare soil below the downspout
- Repeated puddles in the same spot, including on walkways and patios where they can turn slick
- Water backing up where a downspout connects to an underground drain line
Walk the perimeter during one of the first fall rains and note where water actually goes. How far it needs to travel, and which discharge option suits your lot, depends on slope, soil, and local rules. Our article on where downspouts should drain covers those options in detail.
What to Repair Before Winter Storms
Anything that lets water escape the system in the wrong place is worth fixing before winter’s longest wet stretches. Sort what you found into three groups.
Maintenance issues: clean it and check again
- Debris in gutters, outlets, downspouts, or on top of guards
- Overflow that stops once the gutter is cleaned
- A splash block or extension that just needs to be put back
Repair issues: fix a specific part
- Leaking corners, end caps, or seams
- Sagging runs, sections pulling away, or loose hangers
- Poor pitch that leaves standing water
- Repeated overflow at the same spot even after cleaning
- Disconnected or damaged downspouts, outlets, or straps
- Persistent pooling at a discharge point
- Localized fascia damage around gutter attachment points
Possible replacement issues: get a professional assessment
- Leaks at many joints throughout the system
- Sagging in several places
- Widespread corrosion, cracks, or split sections
- Repeated failures after past repairs
- Fascia deterioration along long stretches of the roofline
Most fall findings land in the first two groups. One bad corner or one sagging run doesn’t mean the whole system needs to go, and when damage is limited to a few spots, repair is usually the better value. If you found leaks, sagging runs, or loose hangers, see how we handle fixing damaged gutters before winter.
Get Ahead of Oregon’s Wet Season
Of all the Oregon gutter maintenance you do in a year, a fall inspection is your best chance to find small drainage problems while they’re still small. Clearing debris, confirming water moves freely, and following it all the way to the ground takes an afternoon on many homes, and it beats finding a leak in the middle of a January storm.
Need a Gutter Problem Checked Before Winter?
If you found leaks, sagging sections, damaged downspouts, or drainage problems while working through this fall gutter maintenance checklist, American Gutter Service can inspect the system and recommend the right next step, whether that’s cleaning, a repair, drainage work, or another solution. Call or text (503) 308-1174, or request a free estimate.